前两篇文章,我们知道了怎么去爬取一个电影网站了,下面我们将使用MongoDB把爬下来的数据存储起来。
1. 我们将使用到flask_mongoengine,请大家自行安装,文档(http://docs.mongoengine.org/)pip install flask_mongoengine
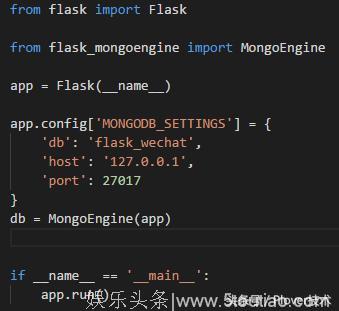
2. 编辑app.py文件,引入mongoDB到项目中
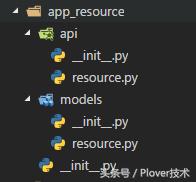
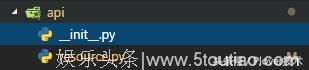
3. 新建我们存放资源的模块,大致结构如下
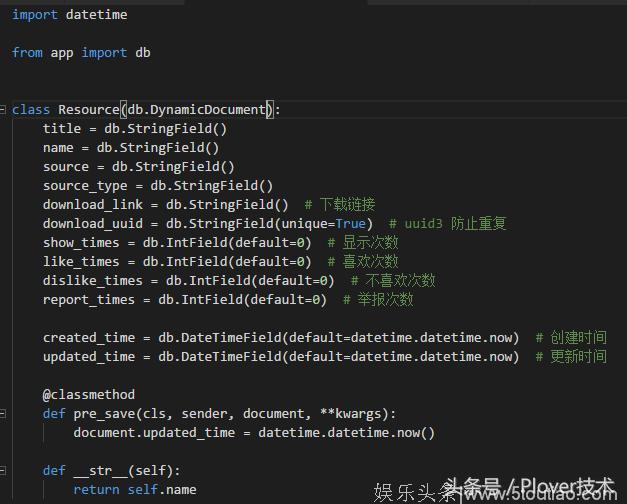
4. 编辑模块下models/resource.py文件,这个文件用来编辑我们资源的models
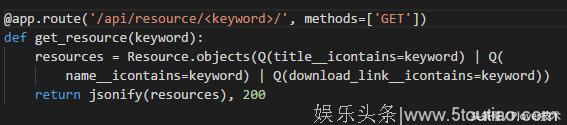
5. 新建api/resource.py文件,里面提供一些基础的api(提供搜索服务)
(提供爬虫服务)
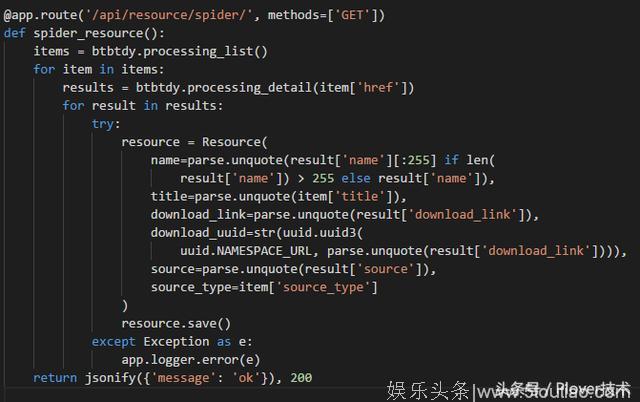
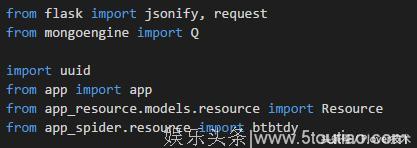
需要导入的依赖
6. 把api/resource.py加入到api模块中

7. 在app.py中引入api

8. 为了方便运行,我们把app.run()单独放在一个文件中

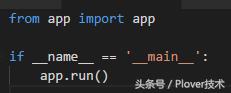
并且删除掉原来app.py中该段代码
9. 运行run.py
10. 打开chrome,输入网址(http://127.0.0.1:5000/api/resource/spider/)爬虫就开始运行了,等待运行完成,打开mongoDB compass(mongoDB的管理工具,可以自行下载)

可以看到,数据都存储到了mongoDB中,我们随机用接口查询一下资源
11. 打开chrome,输入网址(巨齿鲨/)
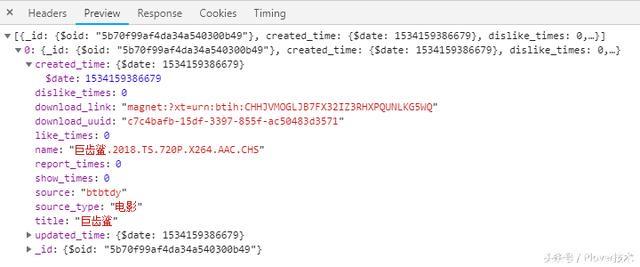
我们的数据就从数据库查询出来了
12. 好了,现在我们有了爬虫,也可以写入数据库了,但是如果每次都需要我手动去输入URL爬虫才能运行,这样不够自动化啊~所以下一章我们将使用定时任务来调起爬虫服务。
(源码请点击了解更多)